
You’ve learned how to tune with fine-tuners and maybe you’ve started to tune using the pegs, but have you ever restrung your instrument? If string breaks and a teacher isn’t around to help you, you might miss out on valuable practice time or performance opportunities. Knowing how to change your strings is an important skill and makes you a more capable musician.
Here’s what you need:
-
New strings (E, A, D, G, or C)
-
Tuning peg winder (if instrument uses gear pegs)
-
Soft cloth + cleaning cloth
-
Pencil
Prepare your work space by placing a soft cloth under the body and scroll - this will protect the varnish and soften any bumps that might happen. Use your cleaning cloth to remove any excess rosin from the strings, fingerboard, and body.
Now, work on one string at a time. This will help prevent string mixups, the bridge moving out of place, and worst of all, the sound-post falling inside the instrument. If you accidentally put a string on the wrong peg or mess with the bridge placement, this can be easily fixed by yourself. The sound post falling, however, will need the hands of a professional luthier and not even your teacher will be able to help with that.
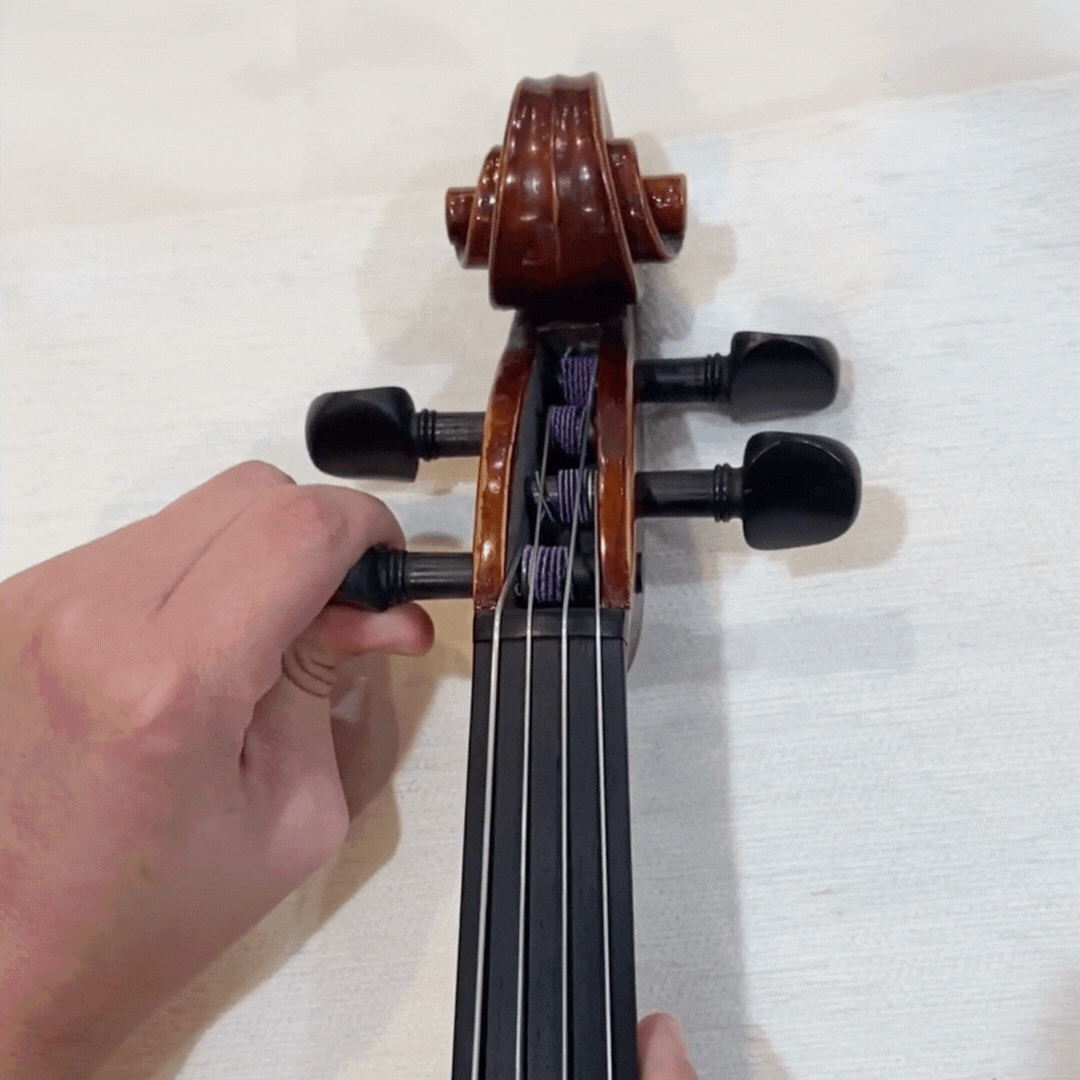
- Unwind your first string by turning the peg towards you (counter-clockwise). Pull string out from the small hole in the peg shaft and slide out the ball end from the tailpiece. Wind this string up for further use or throw it away if broken.
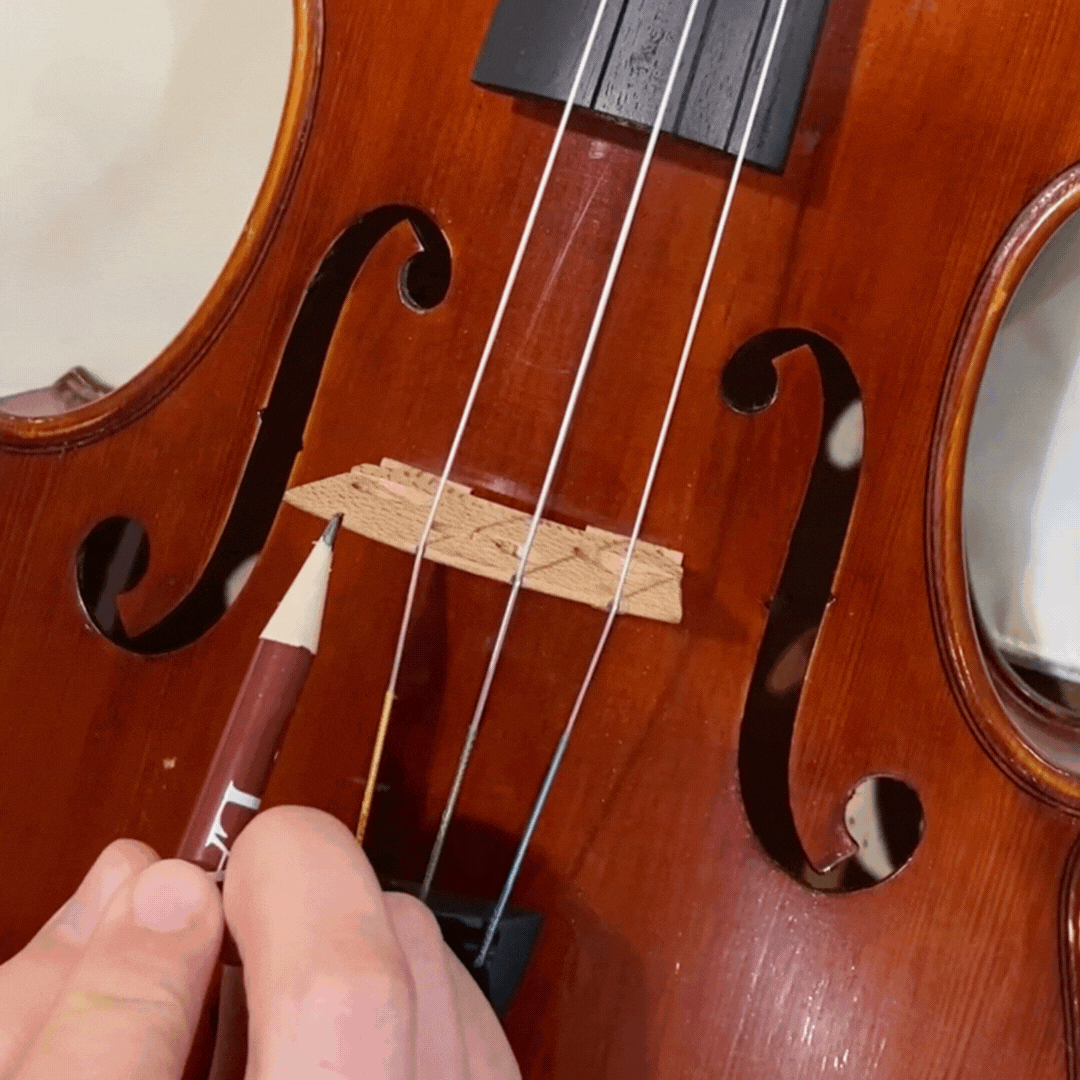
2. Use your sharpened pencil to mark the grooves at the nut and at the bridge. This acts as a lubricant for the strings. If your pencil graphite doesn’t fit into the grooves, sharpen it! It may be too blunt to fit.
3. Rotate the peg so that the small hole in the shaft faces outward toward you. Thread the silk end through the hole in the peg. If it hits the back and continues up into the pegbox, then you’ve threaded it too far.
4. Wrap the string once by turning the peg away from you. The first wrap should be on the tapered end of the shaft (opposite of the peg-head) while the rest will fall closer to the peg-head and the pegbox wall. Make sure the winds are neat and even as you progress. By winding, you will bring tension, and eventually pitch, to the string.
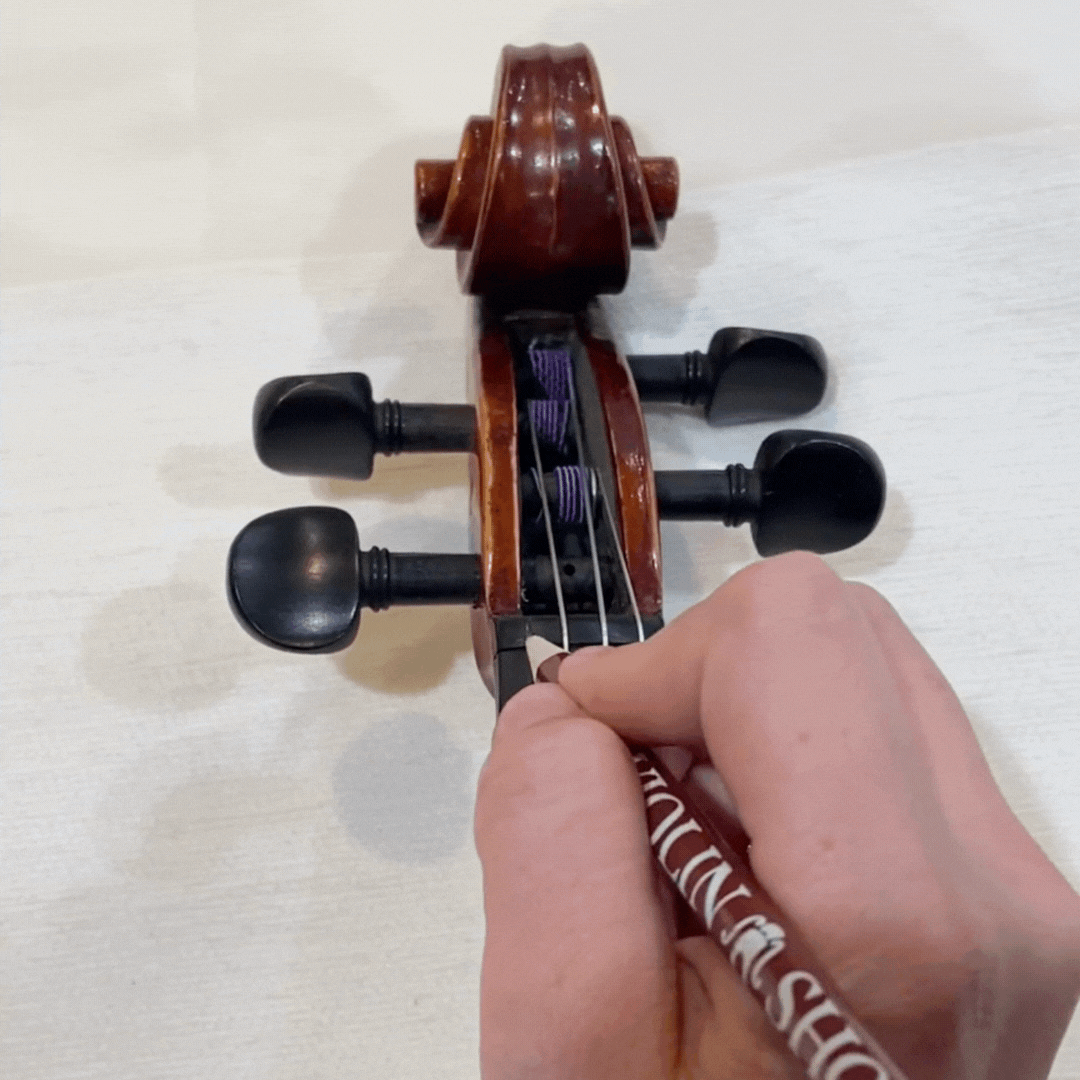
5. Fit the ball end into its slot in the tailpiece and pull in the direction of the bridge to seat it. Some tailpieces are tight enough where it will hold the string without tension while others require it to be strung at the peg first. If it keeps slipping out, don’t worry about it
6. Turn the peg away from you (clockwise) while applying inward pressure. Imagine a corkscrew motion. If you’ve applied enough inward pressure, then the peg will remain in place and will not slip. If the pegs continue to slip or change pitch, try it again with more force. This method will not be applicable to gear-peg owners as the pegs have been installed by a luthier.
6. As the string comes under tension, guide the string into the pencil-mark grooves at the nut and the bridge.
7. Bring the string to an approximate pitch, it will change pitch while you work on the other strings so there’s no need to get it perfect.
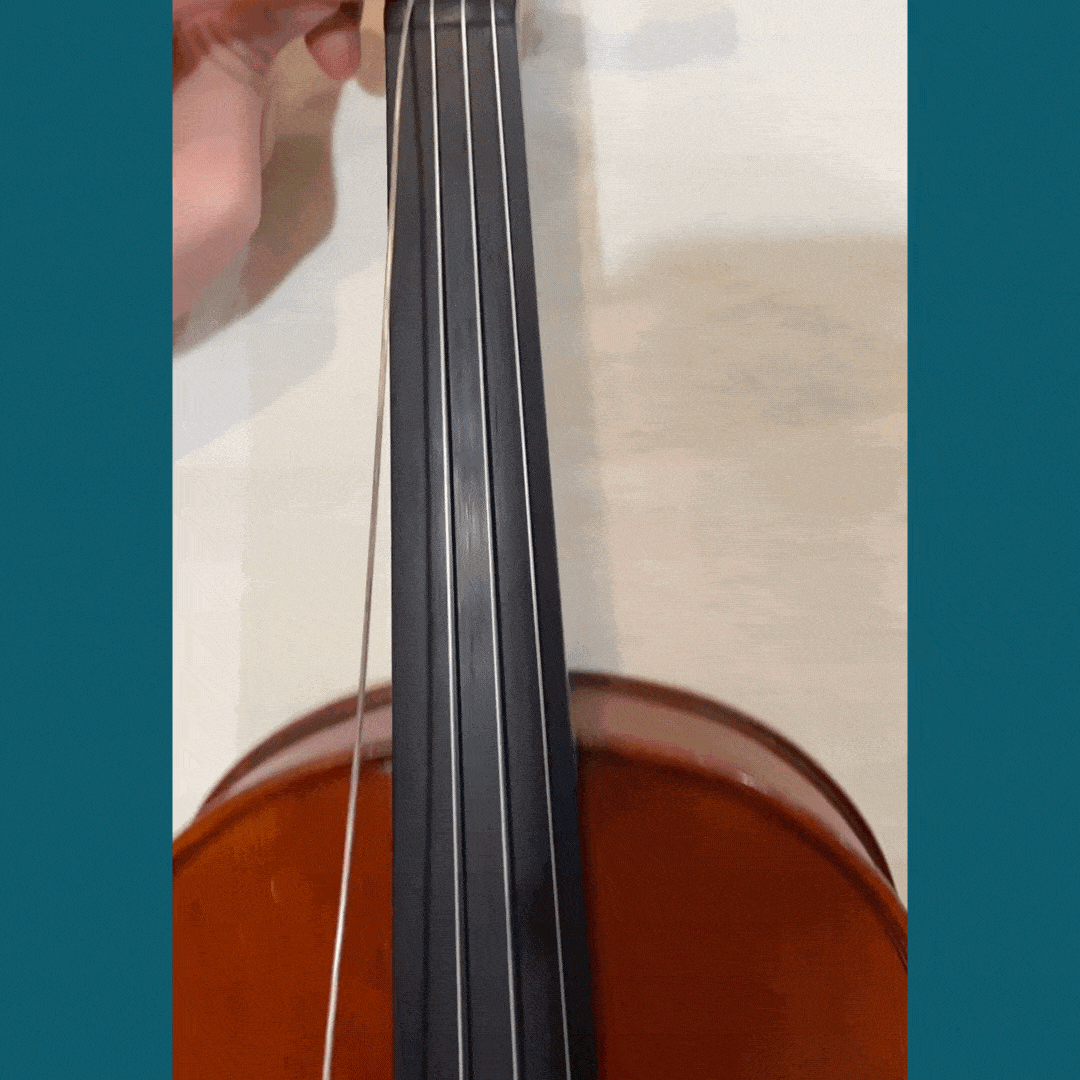
8. Repeat with the remaining strings.
Once you have changed all the strings, use your fine tuners to bring to a more precise pitch. New strings will continue to stretch for about a week and will require tuning every time you play until they've settled.
If you notice that your bridge is no longer standing perpendicular to the instrument but is standing slanted or tilted, you must straighten it. This tilted bridge occurs when you pull the strings under tension all at once. It’s dangerous to leave it be as the weight of the strings can cause it to snap in half, forcing a costly repair.
To Fix a Titled Bridge

- Grip the top of the bridge with your fingertips and incrementally pull it back, away from the scroll. If you’ve marked the bridge with a pencil, this process will be smoother. After you return it to an upright position and its feet are flat on the instrument surface, you must tune the instrument.

2. If you notice that your bridge is now crooked, or has shifted to the side, slowly reduce the string tension (but not so loose that the bridge falls off) and shift the bridge to the proper location. Increase the string tension and take care to correct any titling bridge.


Written by: Sarah Soza